Anyone who spends considerable time typing knows the gradual accumulation of dust, crumbs, and grime that settles between keyboard keys. For many, it's an annoyance shrugged off until keys begin to stick or the board looks visibly unclean. Yet, the practice of regularly removing keycaps for a thorough cleaning is more than an aesthetic choice—it's a crucial aspect of maintaining both the hardware's longevity and the user's health. Over time, debris can interfere with the mechanical switches beneath, leading to reduced responsiveness or even permanent damage. Moreover, keyboards can become breeding grounds for bacteria and allergens. Establishing a routine for keycap removal and cleaning not only preserves your equipment but also promotes a more hygienic workspace.
The process begins with understanding your keyboard. Not all keycaps are designed to be removed, and forcing them can result in broken switches or damaged mounts. Most mechanical keyboards feature keycaps that are meant to be taken off, typically using a keycap puller. Membrane keyboards, on the other hand, often have integrated keys that are not user-removable. Before anything else, identify your keyboard type. If it's mechanical, you're in luck—cleaning will be straightforward. If it's a membrane or laptop keyboard, deep cleaning might require alternative methods, and attempting to remove keys could void warranties or cause harm. Always refer to the manufacturer's guidelines if unsure. Assuming you have a mechanical keyboard, the next step is gathering the right tools: a keycap puller (either wire or ring style), a bowl of warm water, mild soap or isopropyl alcohol, a soft brush, a microfiber cloth, and compressed air.
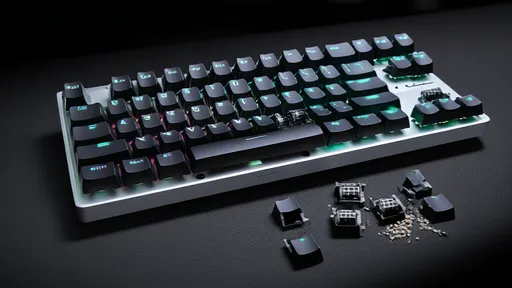
Safety first: always disconnect the keyboard from your computer before starting. For wireless models, turn them off and remove the batteries. This prevents any accidental key presses from causing issues or shortcuts on your computer. It also eliminates any risk of electrical shock, though the risk is minimal with modern USB keyboards. Once disconnected, take a photo of your keyboard layout. This might seem excessive, but it's a simple step that can save you a headache later when reassembling, especially if you're new to the process or have a non-standard layout. Now, using the keycap puller, gently but firmly remove the keycaps. Start from the corners and work inward. For larger keys like the spacebar, enter, or shift keys, be extra cautious as they often have stabilizer bars that can be tricky to reattach.
With all keycaps removed, you'll likely be greeted by a layer of dust, hair, and other debris. Use the compressed air to blow out the bulk of this from the switch housings. Hold the can upright and use short bursts to avoid moisture buildup. After the loose particles are gone, take your soft brush—a clean, dry paintbrush works well—and gently sweep away any remaining dust. For stubborn grime, lightly dampen a corner of your microfiber cloth with isopropyl alcohol and wipe the plate beneath the keys, being careful not to let liquid drip into the switches. Isopropyl alcohol evaporates quickly and is less likely to cause damage compared to water.
Now, focus on the keycaps themselves. Place them in a bowl of warm water with a small amount of mild dish soap. Let them soak for about 30 minutes to loosen oils and dirt. Avoid using harsh chemicals or abrasive cleaners, as these can damage the plastic or fade the legends on the keys. After soaking, agitate them gently with your hands or soft brush to dislodge any persistent grime. Rinse them thoroughly under lukewarm water to remove all soap residue. Soap left on can become sticky when dry, attracting more dust later. Lay the keycaps out on a clean towel to air dry completely. Do not reassemble while they are even slightly damp, as moisture trapped in the switches can lead to corrosion or mold.
While the keycaps are drying, take the opportunity to wipe down the keyboard case and cable with your microfiber cloth dampened with a little isopropyl alcohol. This ensures the entire unit is clean. Once everything is dry, refer to the photo you took earlier and begin reassembling the keycaps. Press each keycap firmly onto its switch until you hear a click, ensuring it's seated properly. For larger keys with stabilizers, you may need to align the stabilizer bars first before pressing down. Take your time with this step to avoid misaligning keys or damaging the switches.
How often should you perform this deep clean? It depends on your environment and usage. A keyboard in a dusty workshop or used while eating might need cleaning every three to six months. In a cleaner office setting, once a year might suffice. Pay attention to signs like sticky keys, visible debris, or an increase in typing errors—these are good indicators it's time for a clean. Regular maintenance, such as weekly dusting with compressed air and wiping with a cloth, can extend the time between deep cleans.
Beyond hardware maintenance, consider the health implications. Studies have shown that keyboards can harbor more bacteria than a toilet seat. Regular cleaning reduces the risk of spreading germs, which is especially important in shared workspaces. For those with allergies, dust and mold accumulation under keys can exacerbate symptoms. A clean keyboard contributes to a healthier computing environment. It’s a simple habit that pays dividends in both performance and well-being.
In conclusion, while the task might seem daunting at first, removing and cleaning your keycaps is a straightforward process with the right tools and care. It protects your investment, ensures optimal performance, and fosters a cleaner workspace. Embrace it as part of your regular tech maintenance routine. Your keyboard—and your fingers—will thank you.

By /Aug 26, 2025

By /Aug 26, 2025
By /Aug 26, 2025

By /Aug 26, 2025

By /Aug 26, 2025

By /Aug 26, 2025

By /Aug 26, 2025

By /Aug 26, 2025

By /Aug 26, 2025

By /Aug 26, 2025
By /Aug 26, 2025

By /Aug 26, 2025

By /Aug 26, 2025
By /Aug 26, 2025

By /Aug 26, 2025

By /Aug 26, 2025

By /Aug 26, 2025
By /Aug 26, 2025
By /Aug 26, 2025

By /Aug 26, 2025